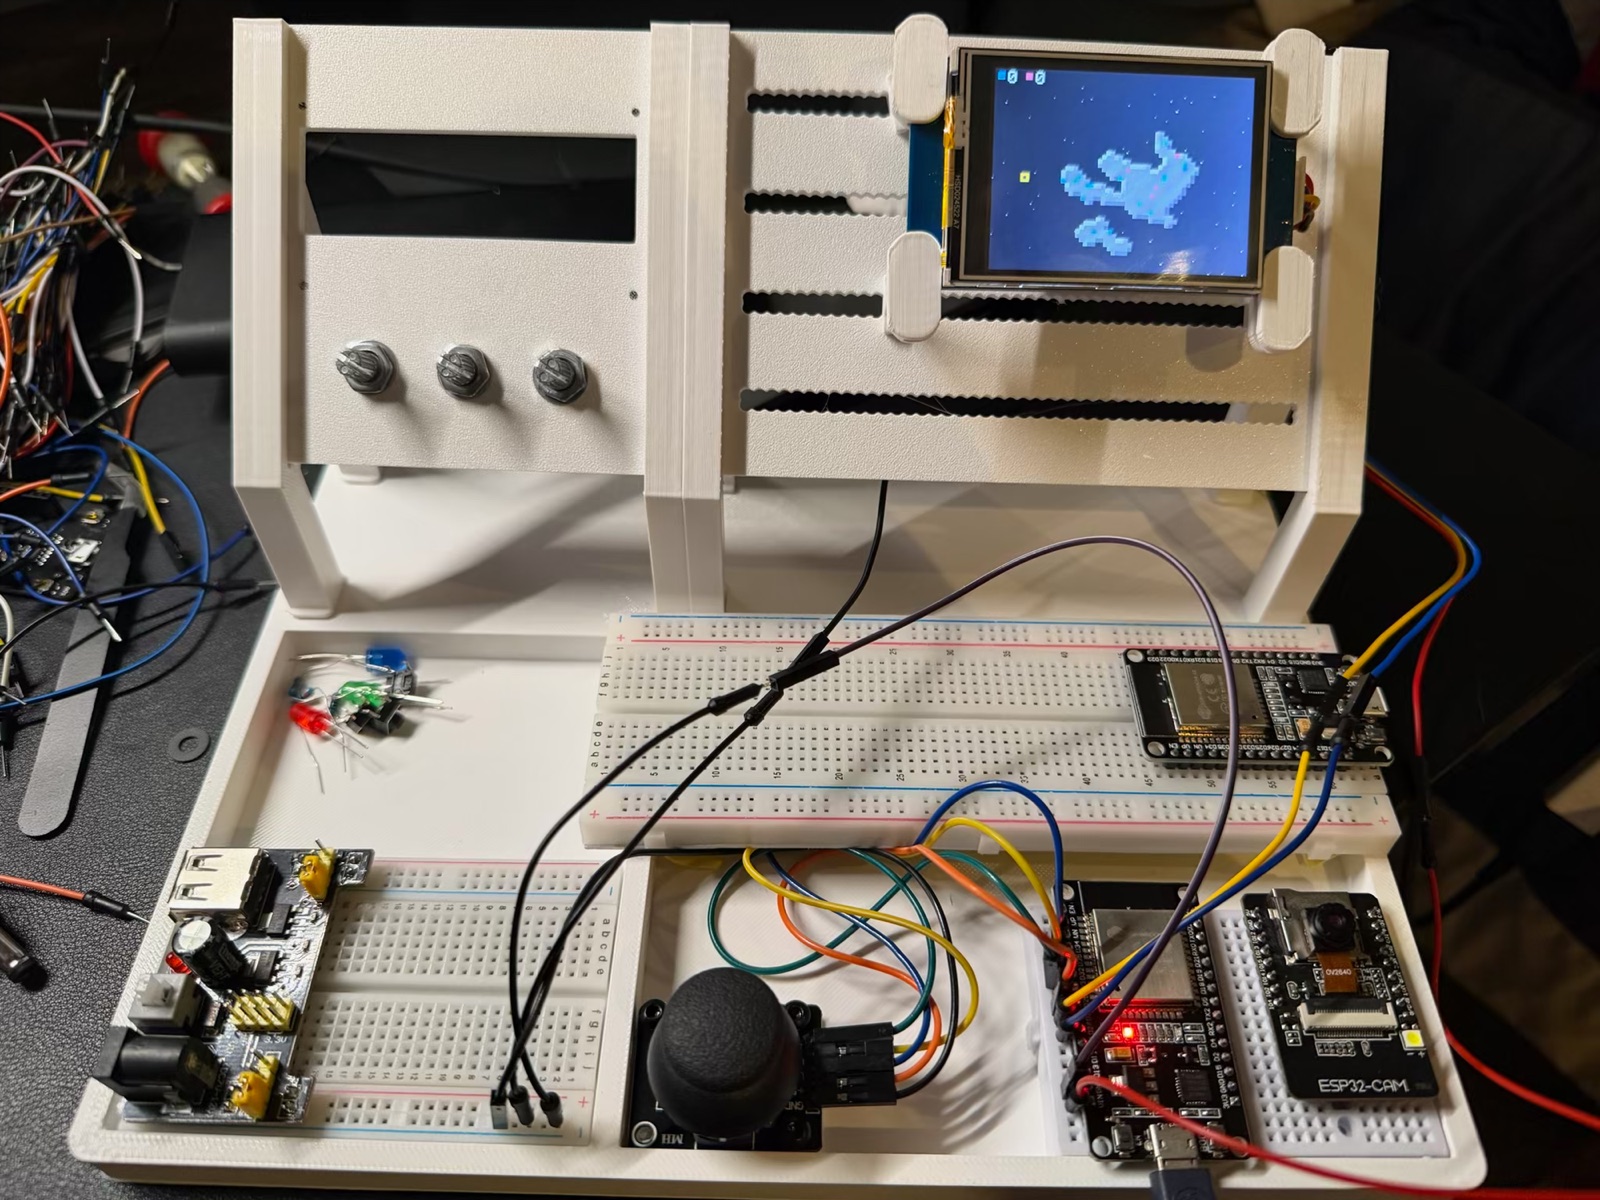
I designed and 3D-printed an electronics studio rig, and both projects now live in it. The base holds the breadboards, the boards and the wiring. The upright back panel has a slotted mount for the Nextion, which can sit anywhere along the slots, and a side panel with three knobs and a cutout holding a big red push button.
Asteroid Test. The second ESP32 sits on the small front-right breadboard, wired to the joystick, with the ESP32-CAM parked next to it and the MB102 power module on the left-hand board. Up on the back panel, the Nextion shows an asteroid with its gems, the yellow digger, and the gem counter in the top-left corner.
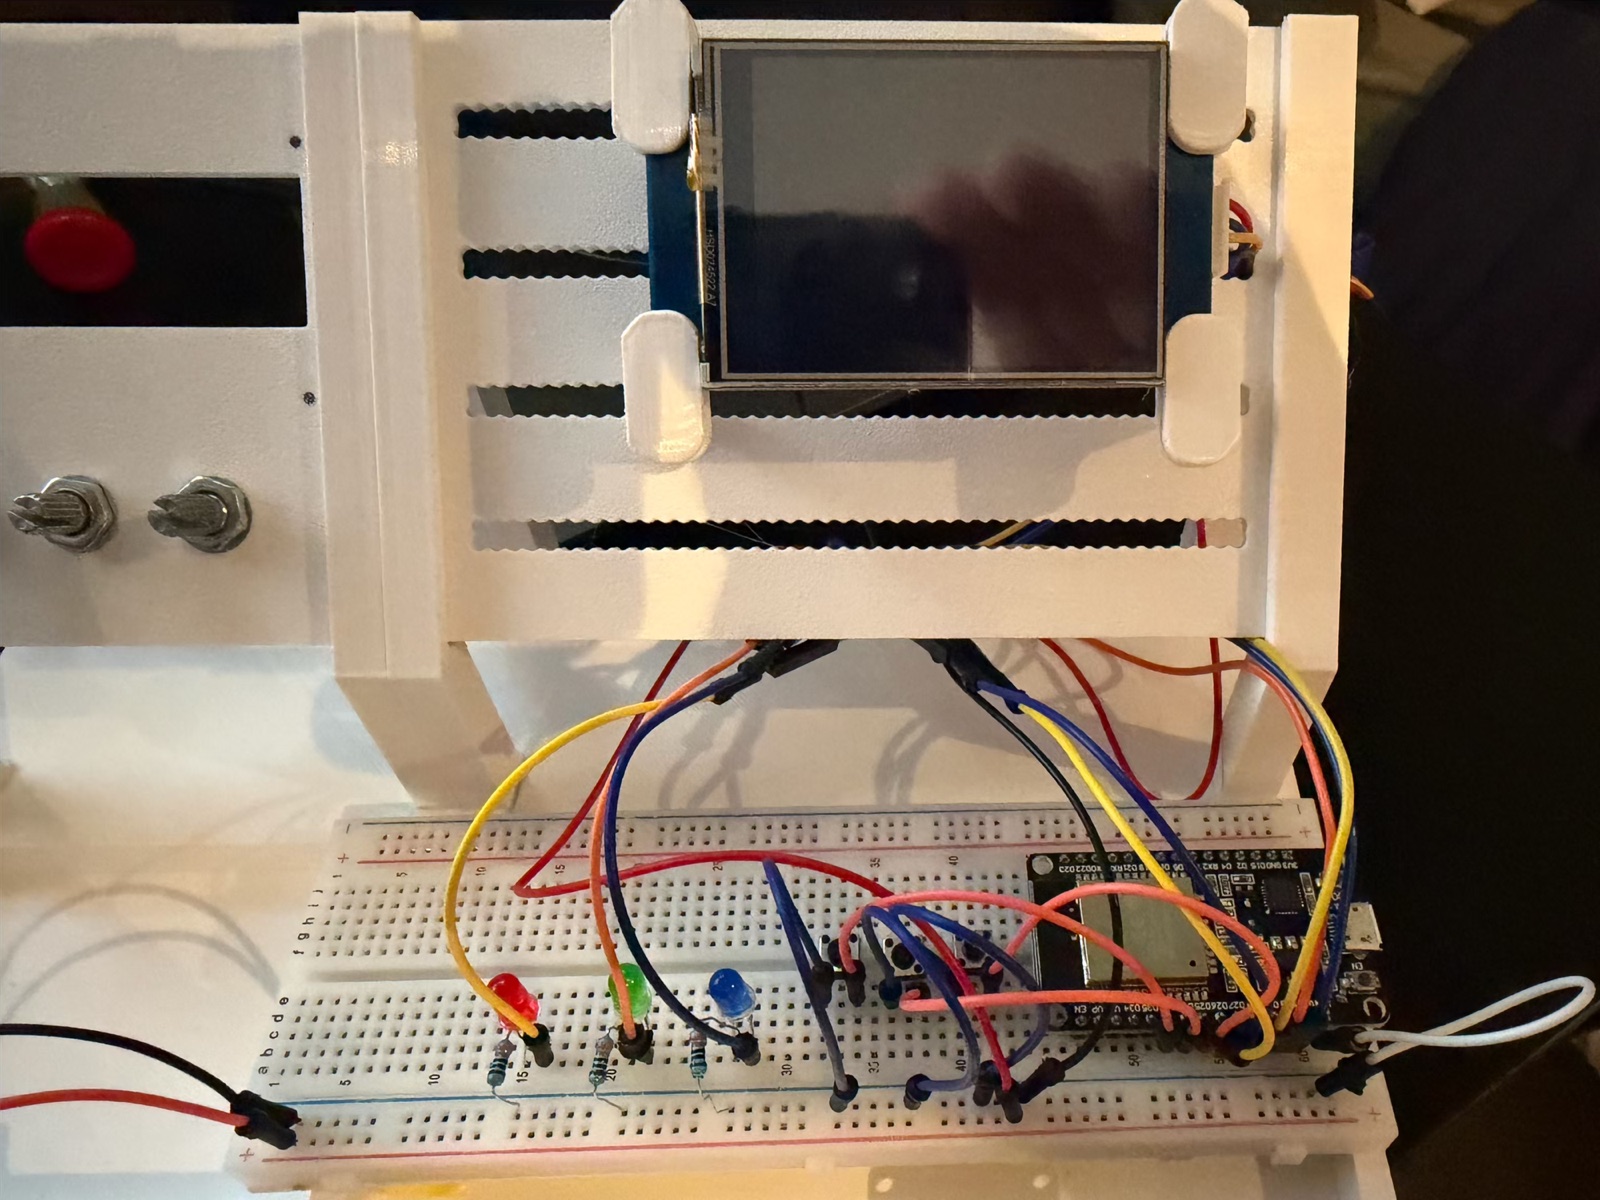
LED Blink Sequence. The original ESP32 sits on the long breadboard across the middle of the base, with the OFF / ON / MODE buttons and the red, green and blue LEDs, each LED's resistor going to the − rail.
Not wired yet: the three panel knobs and the big red button.
Comments (0)